Getting started with CWSRestart
Hello there! This little guide will walk you through the process of setting up a small server with CWSRestart.
Using CWSRestart with the stock server.exe
Requirements
To follow along, you need of course a CubeWorld server. In this case, we'll use the server.exe, that comes with CubeWorld. It should be located in your CubeWorld directory. If you want to host a server that is accessbile from the web, you should either forward your ports or enable UPnP. You can read on how to do that in your routers manual.
You also need the most recent build of CWSRestart. Head to the download page over at GitHub, and look for the version with the green Latest Release sign next to it. Then download the CWSRestart.zip.
You may also need to install the .NET Framework 4.5, if not already installed.
Basic settings
Now that everything is in place, we can get started. Simply open CWSRestart and you will be greeted with the default interface. You can use the small arrows to hide certain areas of the interface.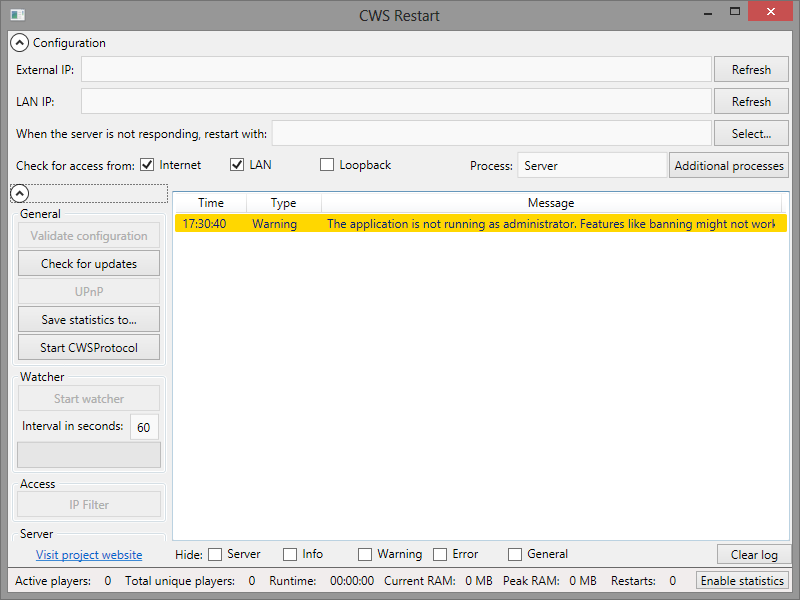
For UPnP users: Press the UPnP button, to open up the UPnP wizzard. Now press Refresh followed by Open ports to open port 12345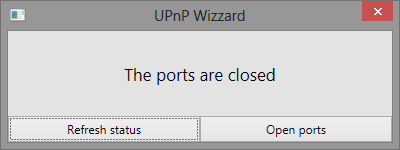
The first thing we need to do, is to enter the LAN and Internet IP into the two textboxes. You can also click "Refresh" to get your IP automatically. Then you need to hit Select... and browse for your server.exe. After everything is done, the interface should look like this: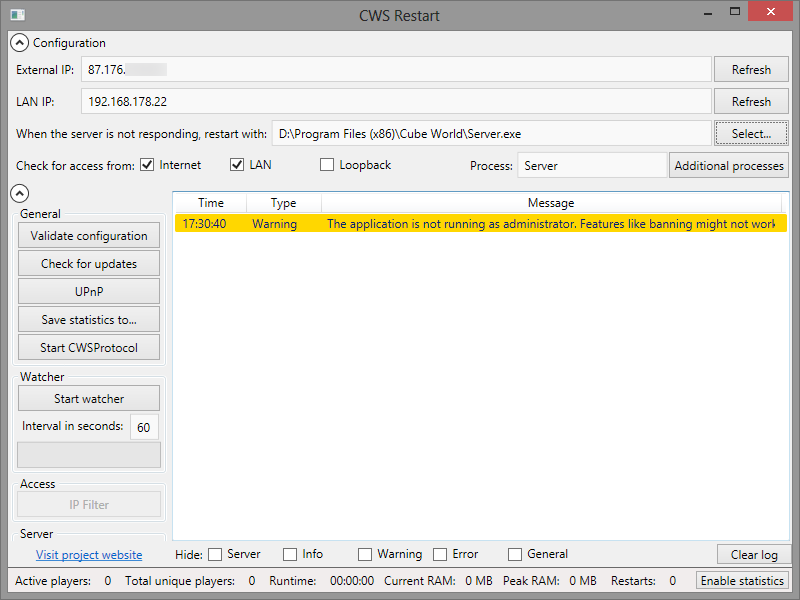
The next step is to configure the watcher. The watcher will run every 60 seconds and check if server.exe is still running. It will also try to connect to your IP, to see if the server is still answering to connections. To start the watcher, click the Start watcher button on the left side. A progressbar will indicate when the next check is scheduled. You can change the interval by editing the 60. Let's change this value to something else. Enter 30 and press Enter. After 30 seconds, the server.exe will be started by CWSRestart (in case you haven't started it already). If you want to host a LAN only server, uncheck the Internet checkbox.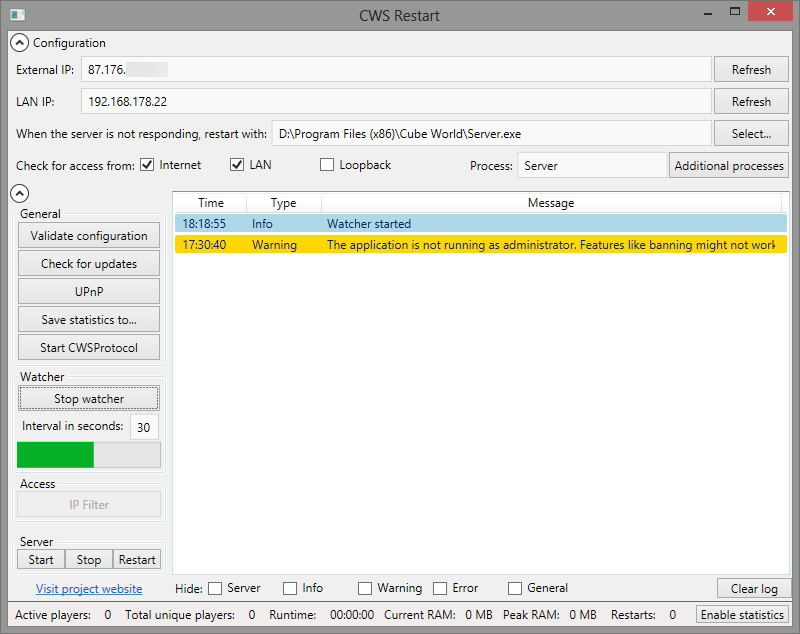
This is the basic setup. If you want to stop CWSRestart, just press the Stop Watcher button. You can stop the server with the buttons on the bottom left (you might need to resize your windows, if you can't see those buttons).
You will see everything that CWSRestart is doing in the log area. The log will keep the last 500 entries. Everything older will be discarded, to save memory. You can filter the log by ticking the boxes below the log area.
Using CWSRestart with a custom launcher
Some people like to modify the server with DLL injections. There are quite some custom launchers out there, so let's take a look at how to use them with CWSRestart. First things first: Start CWSRestart and fill in your IP. Then use the Select... button to browse for your launcher (or for a .bat file that launches your launcher).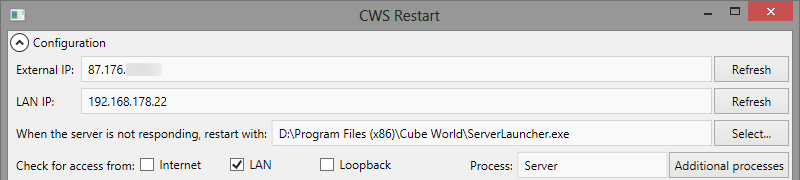
Now click the start button in the lower left corner. This should start your custom launcher. If your launcher closes after starting the server, you are already finished. But if your launcher starts multiple process, we need to let CWSRestart know which processes belong to your launcher. Go ahead and click the Additional processes button on the right side. Either search the process in the upper list and double click it, or enter the name in the Add box and press Enter. You can remove entries by double clicking on them.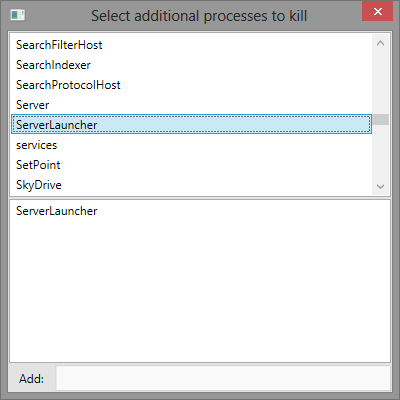
Setting up CWSWeb
CWSWeb adds a web interface to your server. It allows you to display statistics to your users and you can do some administrative tasks through your webbrowser. To get started, you'll need to download CWSWeb from the Releases page on GitHub. Extract it to a folder of your choice. Now we need to unblock the downloaded files. By default, Windows marks files from the web as untrusted, and on some setups this will prevent CWSWeb from working. You can either rightclick every dll and exe and go to Properties. There you will find an Unblock button. Or you can use a small setup script:
The setup script
Download the setup script (rightclick &arr; save as) from the Tools folder and save it in your CWSWeb directory. Start PowerShell as Administrator and cd to your CWSWeb directory (for instance with cd "C:\Program Files\CWSWeb\"). In this directory, start the script with .\setup. You will now be asked, if you want to unblock the CWSWeb files. Type y. If you want, you can add a firewall rule for port 8181 as well.
Starting CWSWeb
Now we are ready to start CWSWeb. Start CWSRestart, and click Enable CWSProtocol. Now start CWSWeb to open the server console. On the first start, you might see an UAC prompt. This prompt is needed to allow CWSWeb to listen for incoming connections. You need to confirm this prompt in order for CWSWeb to work. Optional: if you want to run CWSWeb on a diffrent port, start it from the console with the port as parameter. For instance with CWSWeb 80.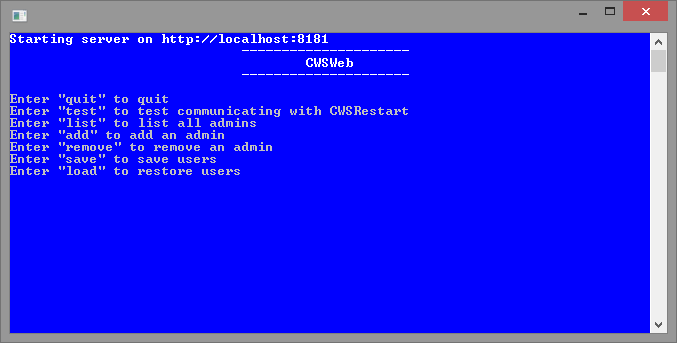
You can now see the command list displayed above. Feel free to try out every command. You can't break anything. I'd suggest you start with test. If everything is configured correctly, you should see a Connection succesful message. If not, make sure you have CWSProtocol enabled in CWSRestart.
Adding administrators
To add an administrator, simply type add in the server console. This will prompt you for the username and the password. After adding an administrator, you can confirm the users with the list command. To log into CWSWeb, point your browser to http://server-ip:8181 and log in with your username and password. The various webpages are described in the manual.
Statistics
By default, users will see a 403 page when pointing to your server ip on the given port. If you want to display statistics do the following: In CWSRestart, click the Enable statistics button in the bottom right corner. This will allow visitors to see the current amount of players, the total amount of players and the uptime of your server. If you want to display an activity graph as well, hit the Save statistics to... button, and select a folder where you want to save your statistics files. After a few seconds, your users should see activity charts. The statistics will update every few seconds, and the data on the server is cached to increase performance.
Userbars
The customization of userbars is described in the manual.