Building Anki 2.1 on Windows 10
Posted on April 18, 2018 | Reading time 6 minutes- I will highlight how I set up my system to build Anki 2.1 on Windows 10
- These steps will guide you to set up a similar environment on your machine
Aim
I wanted to have a set-up, where I can easily run Anki 2.1 from the cloned source code. For windows, there are several workarounds for compatibility issues with the current tool chain. Most of them due to the fact, that some build scripts are written in bash.
Instead of using workarounds, I wanted a system leveraging the Windows Subsystem for Linux, which offers high compatibility with a wide range of Linux tools.
Prerequisites
You will need an up-to-date version of Windows 10 Professional (or Windows 11) to reproduce this setup. This process will take between 30 and 45 minutes, depending on your hardware and internet connection. Around of 400 megabytes will be used for libraries and developmental tools.
Setting up Python 3.6
As outlined in my first post about addons, I will use the Conda package and environment manager which comes with the scientific Anaconda distribution. A more lightweight version is Miniconda, which excludes the scientific libraries, that are included with Anaconda.
I use a separate environment of Python 3.6 for Anki 2.1. This is created via conda create --name anki21env python=3.6. The command will prompt you to confirm the installed packages. When finished, the console will also tell you how to activate this environment:
| |
We can confirm the version in this environment via (Text after > denotes input):
| |
Cloning the repository
Using the Git Shell that comes with GitHub Desktop, I clone the current developmental build into a new directory. The following commands are run inside Git Shell (you can use Tab to autocomplete directories and commands):
| |
If you come across issues, you can check out the README.development inside the cloned files. This file lists the requirements for running Anki (i.e. required packages)
Installing WSL
WSL is the Windows Subsystem for Linux. Start PowerShell as administrator and run Enable-WindowsOptionalFeature -Online -FeatureName Microsoft-Windows-Subsystem-Linux. After that, you need to restart your PC.
Next, we want to set up a Linux distribution. I tend to go with Ubuntu, which you can get via the Windows Store. Go ahead and install it. Once the setup is done, start Ubuntu via the Start button or via the start menu. After a few minutes of installation, you will be prompted to set up a user account in Ubuntu. This doesn’t need to match your Windows name.

The installer prompts you to set up a user for the Ubuntu system
Continuing in VSCode
I will continue using the integrated terminal in VSCode, because when building add-ons, you will most likely be in VSCode (or another editor of your choice). You can open the integrated terminal via Ctrl + Shift + P and then via the view terminal command.
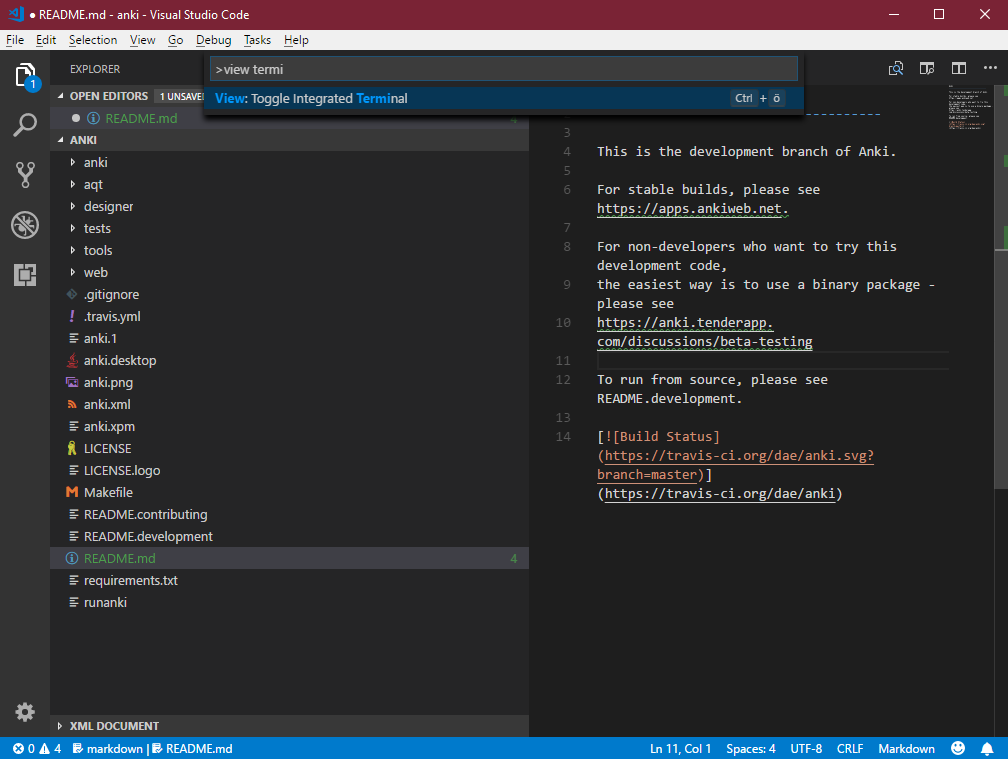
You can open the integrated terminal in VSCode either via the command palette or via the View fly out.
Next, need to generate some QT files needed by Anki. The build scripts to generate these files are bash scripts, so we need to enter the Ubuntu bash by using the bash command.
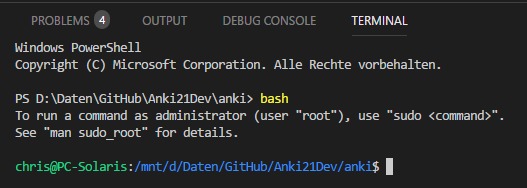
Next, we install a package into our Ubuntu subsystem. First, we update the package list via sudo apt-get update, and then we install the Python Qt5 DevTools via sudo apt-get install pyqt5-dev-tools. This will also install packages required by the development tools, and take around 200 MB. This process has to be done only once.
Now we will run the build_ui.sh script inside the project root (the folder containing the anki, aqt, designer subfolders and all the other stuff). But this will most likely result in an error (this time input after $ denotes commands, since we are on a linux shell):
| |
Culprit are Windows line endings, which differ from Linux. Bash has issues with the escaped characters. We can either convert these line endings manually, or use the dos2unix command, which is installed via sudo apt-get install dos2unix.
We can now preprocess the file with dos2unix and run the converted output into bash:
| |
You need to repeat this step every time you update your code files!
Now it’s time to exit the Linux shell by using exit.
Other packages
We need to install further packages. Therefore, we need to activate our environment again. This can be cumbersome with PowerShell, so we will just use the normal command prompt for that. You can open it (in VSCode) via Ctrl + Shift + C.
Run activate anki21env to select the environment.
Now we want to satisfy some dependencies. We start with pip install mpv and pip install pywin32. Next we install PyQt5. We can’t use Conda, since the version there doesn’t support QtWebEngine. So let’s use pip install pyqt5==5.9 instead (we need to install 5.9 since Anki won run with the most recent version at the time of writing).
Finally, install the packages inside requirements.txt using pip install -r requirements.txt.
These are the bare minimums to get Anki started.
Starting Anki 2.1 from VSCode
Finally, we need to set up a launch configuration. Hit Ctrl + Shift + P and enter launch.json to go to your launch.json file. I created a configuration similar to the one below:
| |
Now you can launch Anki 2.1 using the integrated debug command, after selecting the environment in VSCode in the bottom left corner (see the arrow):

Select the environment by clicking this text.
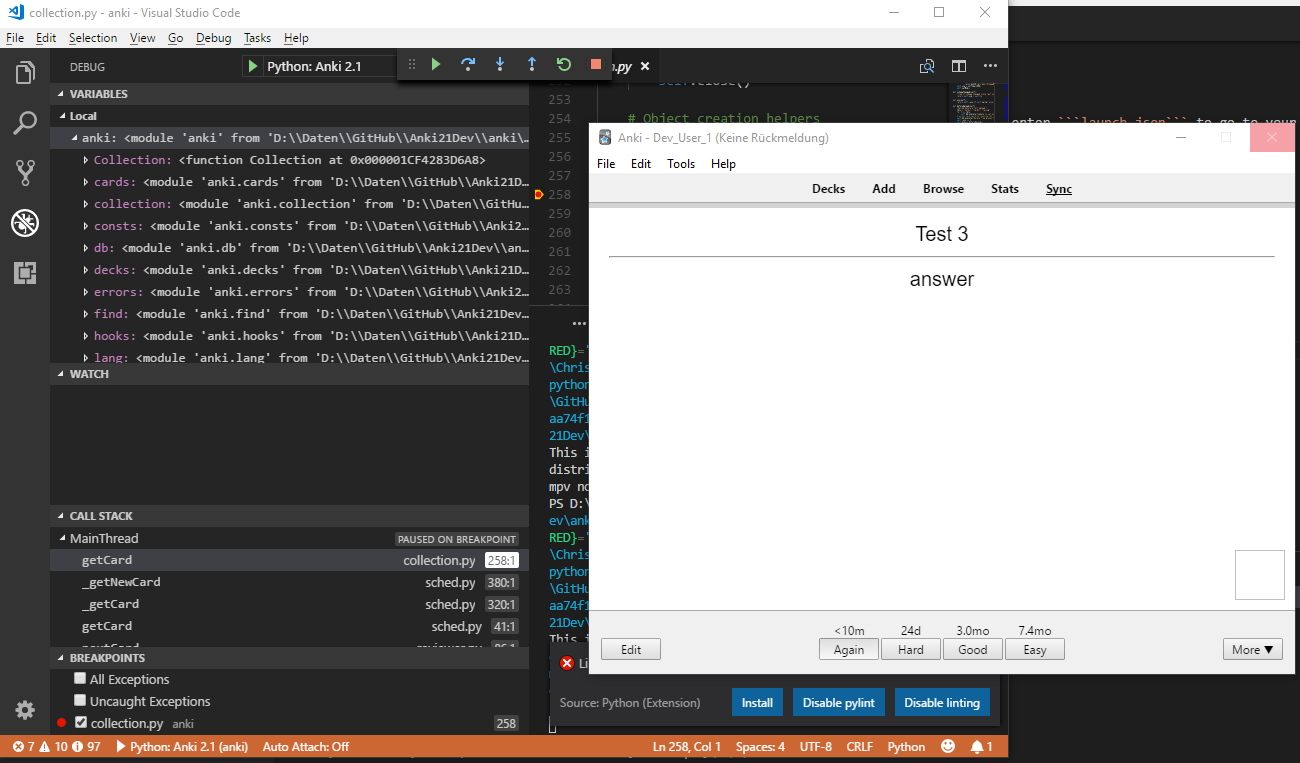
After all that, we can debug Anki and every extension we write
Final remarks
This concludes the initial setup. There are still some steps to take, when you want to work with media and audio, which I haven’t needed so far. This outline is intended to get a basic setup going, so I can debug extension written for Anki 2.1 using VSCode, which it does. The WSL allows for elegant use of the existing tool chain, and the integrated package managers make updating dependencies easier than manual installations. If you have other solutions or ideas to improve this outline, let me know in the comments below!