Setting up VSCode for Anki add on development.
Posted on February 13, 2018 | Reading time 7 minutes- I will highlight configuration steps to set up Visual Studio Code for Anki development
Recently, I wrote my very first add on for Anki, using Visual Studio Code with the official Python add-on for VSCode. With Visual Studio Code, you can easily write and debug code and add-ons, you will write in the future.
Prerequisites
To get full debugging support, we need to get the Anki source. It is available at the download section of the website under Linux/BSD → Other Options → Source.tgz. At the time of writing, the version was 2.0.47. Download the source and extract it to a location of your liking.
Python 2.7
The section below will describe how I set up my Python 2.7 environment. If you have Python 2.7 already set up, you can skip ahead. Just make sure, you can run anki from source before proceeding, by using the
anki.batfile in the source directory
Now, we need to get Python 2.7 running. On my machine, I have Anaconda installed, so I will create a new environment for Python 2.7, using the conda package and environment manager which comes with the scientific Anaconda distribution. If you’re interested in a more lightweight setup, you can also try out Miniconda, which excludes the scientific libraries, that come with Anaconda.
I set up the environment with conda create --name python2 python=2.7. This will create a bare-bones Python 2.7 environment without any additional stuff in it. Once successful, this command will also state how to activate the new environment:
| |
We can check our setup on the command line via (> denotes input):
| |
Before installing additional modules, make sure your virtual environment is set to the newly created one. Here, this is shown by the (python2) in front of the command line input.
We also need PyQt in version 4 conda install pyqt=4, which will include of additional dependencies as well, including Qt. Finally, we need the Python extensions for Windows, conda install pywin32.
Now everything is set up, and you can run Anki by starting anki.bat from the command line (inside your environment).
Setting up a project folder
For my add-on, I’ve set up the GitHub folder ready, to run Anki straight from the current directory. This way, one can easily fork the add-on, and create a new profile (for debugging purposes) in the same directory. For that, we will have the following structure:
| |
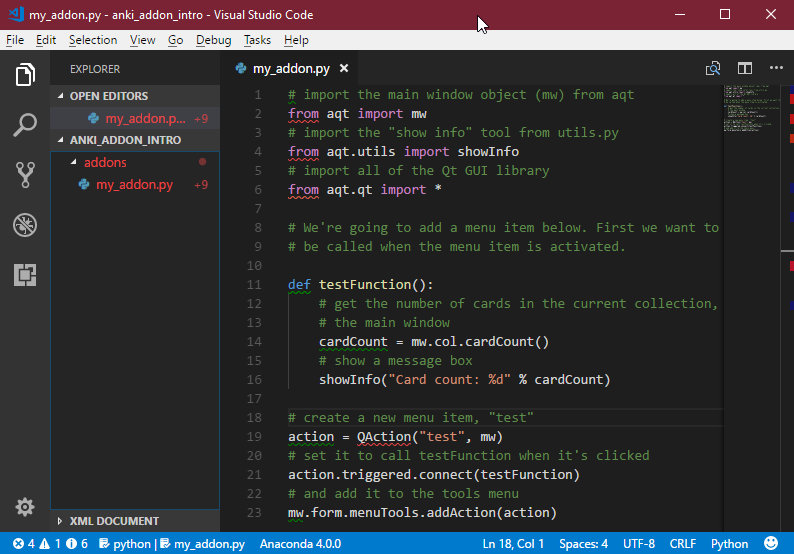
In the file my_addon.py, I’ve inserted the test code from the documentation}, which you can find below:
| |
Now you should end up with something like this in VSCode:
Configuring the “run” action
Hit F1 and enter “launch”, to create and edit the launch.json configuration file

The now opened .json file is documented here and allows us, to specify the Python directory and command line arguments. We need to specify the options as below:
| |
As you can see, you need to specify multiple values:
pythonPath: is pointed to the python binary. This will reside (with Anaconda/Conda) in your setup directory, in the subfolder “envs”program: points to the entry python file. This is actually the file that is invoked viapython runanki, when you start anki viarunanki.batargs: We can specify a custom profile location via the-b PATHcommand. This way, Anki creates a new profile in the current directory (note the.as current folder). Also, since our code is already in the addons subfolder, it will run as soon as we start Anki.
Hit F5 and debugging should start. You can also start debugging via the debugging pane on the left (under the “No bug” sign).

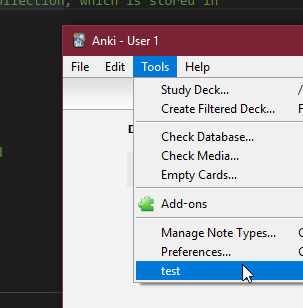
Create a new profile, and open the “tools” menu. And there we have it: our “test” entry got created:
Autocomplete
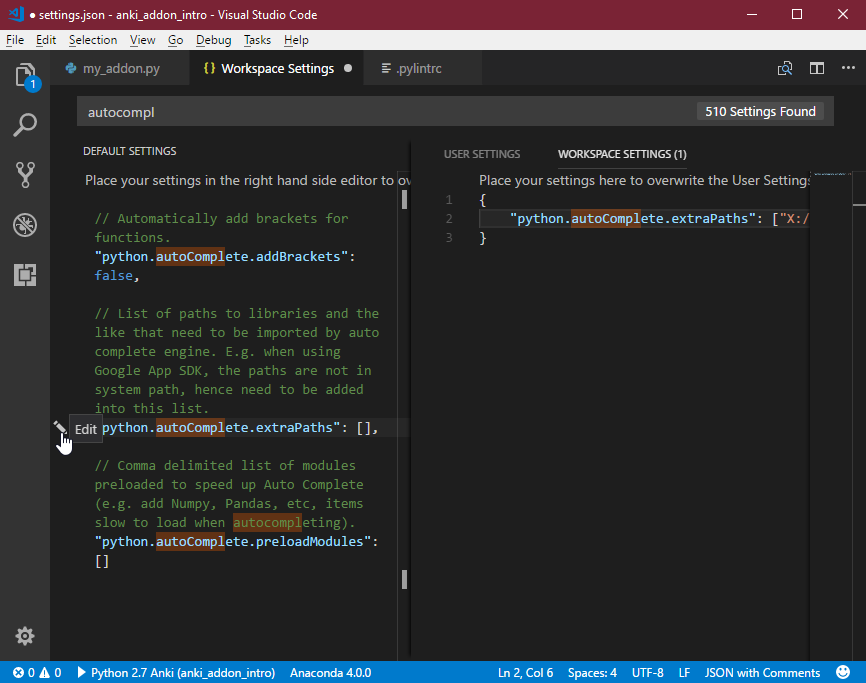
First, it would be nice to have auto-completion and code lookup working. We can enable this in the workspace settings:

Search for “autocomplete”, click the pen symbol next to "python.autoComplete.extraPaths", and again add the path to your Anki source location. Be careful to either escape backslashes or use forward slashes.
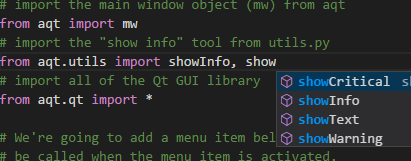
You are now able to use Intellisense to autocomplete names and functions. You can also go to the corresponding source for Anki files with Ctrl and clicking a function name, and you can see annotations/docstrings if available.
Linting
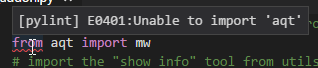
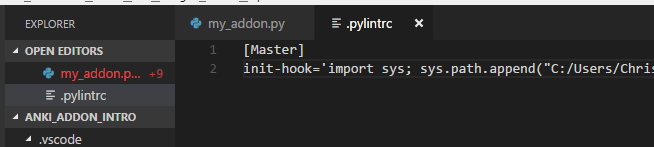
Now, you might note, that after saving, a lot of squiggly lines appear. This is because the linter invoked by the VSCode extension doesn’t know where the Anki source code is located. We can remedy this by creating the file .pylintrc, specifying where your Anki source code is located:
| |
After editing and resaving your file, all the red squiggly lines will disappear.
If there are still errors in the linted file, this might due to VSCode using the wrong linter (i.e. a Python 3 linter instead of 2). We again can remedy this in the workspace file, by editing the workspace settings, and specifying the python.pythonPath. You need to give the fill path to the python executable, like we did in the launch.json file.
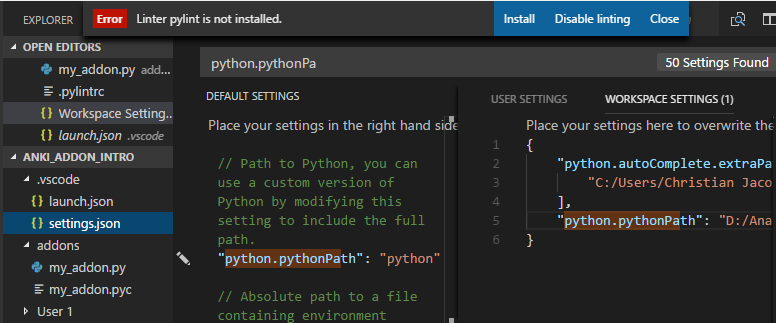
Sometimes VSCode is unable to install pylint. In that case, go to the command line, activate your environment (>activate python2) and run >conda install pylint. Now everything should lint fine. In my experience, pylint has some issues with pywin32 sometimes, but it should give you a general idea.
.gitignore
Last but not least, it would be a good idea to exclude some stuff in a .gitignore file, in case you want to use version control. My file looks like this, to exclude VSCode settings, pylint settings, *.pyc files and the actual Anki profile that is generated:
| |
Final remarks
Now you’ve got everything up and running. You have a full debugger at your hands, you can set breakpoints and inspect variables at run time. If you need starting help with the actual code, I encourage you to check out other plugins source code from listing on Anki Web. And if you are missing ideas for add-ons, there are often times simple request on the Anki Subreddit.
Most initial steps might seem cumbersome, but once you know what you need to set up, you will redo these steps in no time!